Deploying meta-llama-3-7b-instruct LLM from W&B using Friendli Dedicated Endpoints
Hands-on Tutorial
Introduction
With Friendli Dedicated Endpoints, you can easily spin up scalable, secure, and highly available inference deployments, without the need for infrastructure expertise or significant capital expenditures.
This tutorial is designed to guide you through the process of launching and deploying LLMs using Friendli Dedicated Endpoints. Through a series of step-by-step instructions and hands-on examples, you'll learn how to:
- Select and deploy pre-trained LLMs from W&B artifacts
- Deploy and manage your models using the Friendli Engine
- Monitor and optimize your inference deployments for production-readiness
By the end of this tutorial, you'll be equipped with the knowledge and skills necessary to unlock the full potential of LLMs in your applications, products, and services. So, let's get started and explore the possibilities of Friendli Dedicated Endpoints!
Prerequisites:
- A Friendli Suite account with access to Friendli Dedicated Endpoints
- A W&B account with an api key (as an access token)
Step 1: Create a new endpoint
- Log in to your Friendli Suite account and navigate to the Friendli Dedicated Endpoints dashboard.
- If not done already, start the free trial for Dedicated Endpoints.
- Create a new project, then click on the "Create Endpoint" button.
- Integrate your W&B account with an api key.
- Fill in the basic information:
- Endpoint name: Choose a unique name for your endpoint (e.g., "My New Endpoint").
- Environment: Select production if the endpoint is used for mission-critical tasks. Only shown to you as a description.
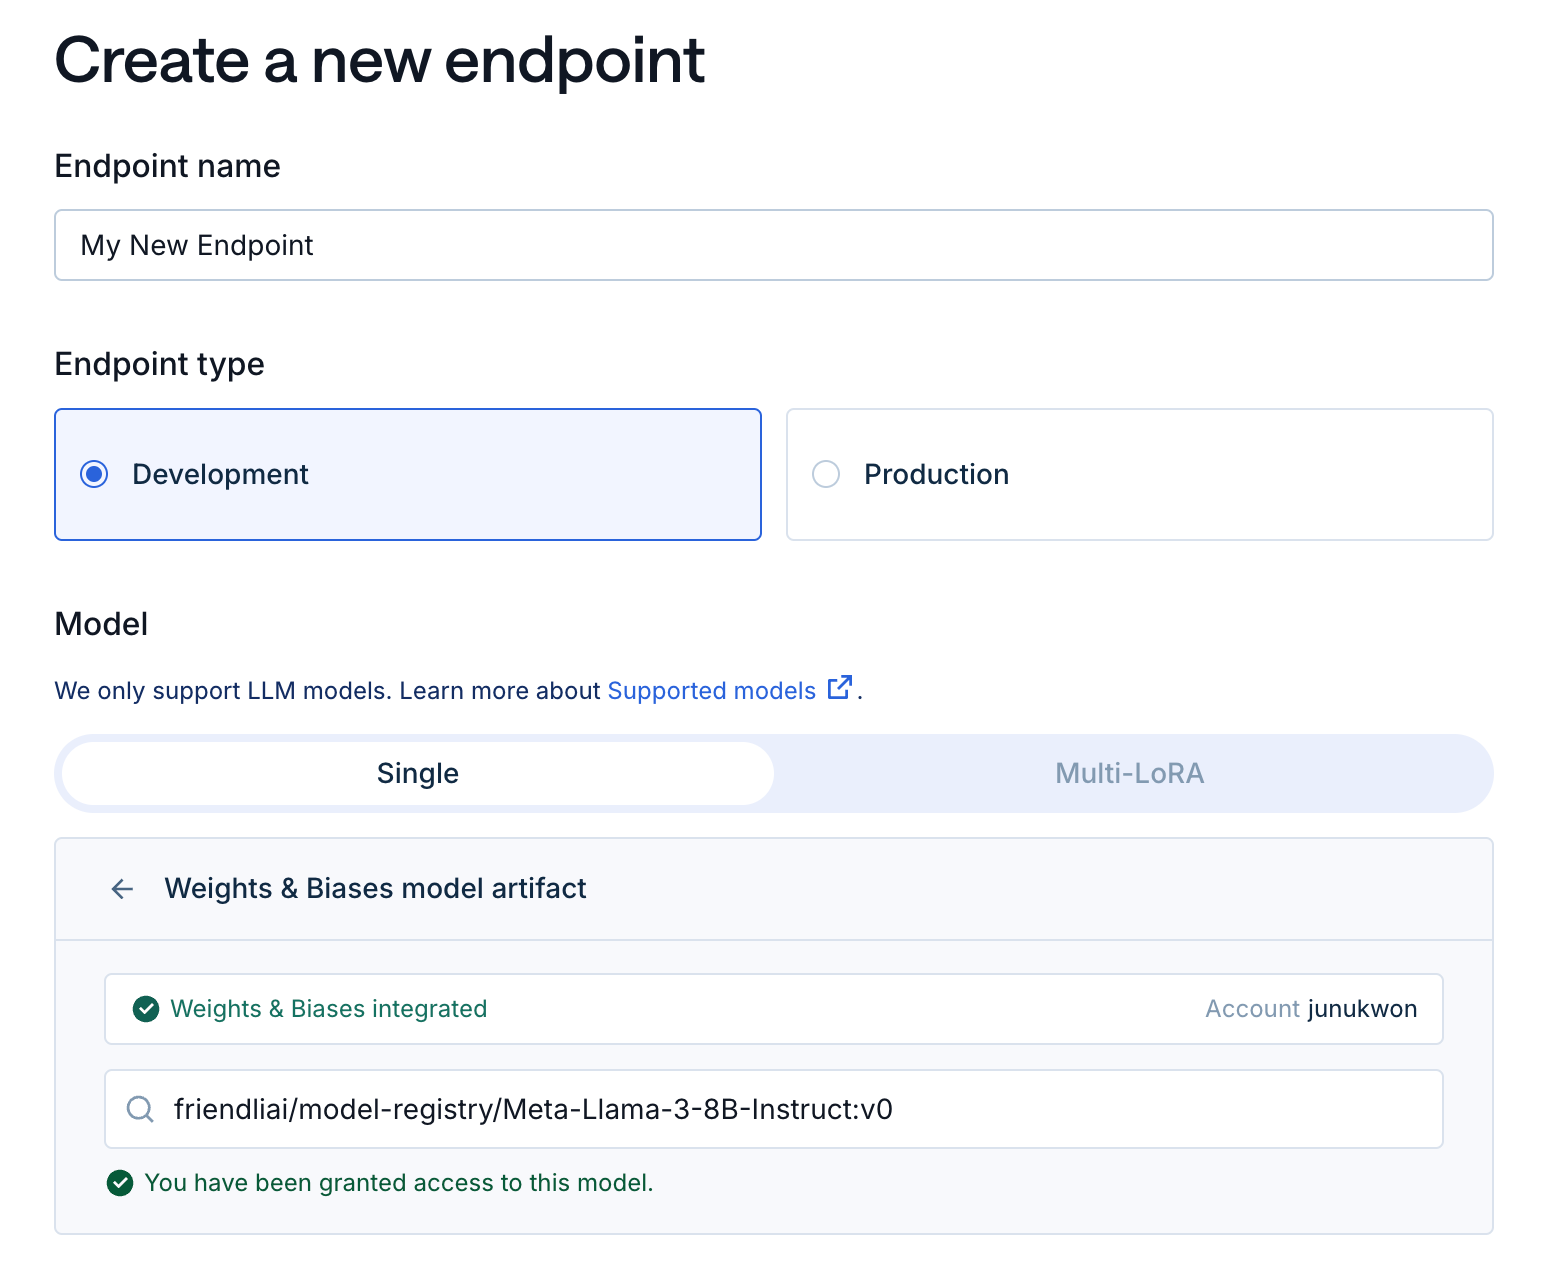
- Select the model:
- Model Repository: Select "W&B" as the model provider.
- Model ID: Enter
friendliai/model-registry/Meta-Llama-3-8B-Instruct:v0as the model id.
note
- If you’re using your own model, check Format Requirements for requirements.
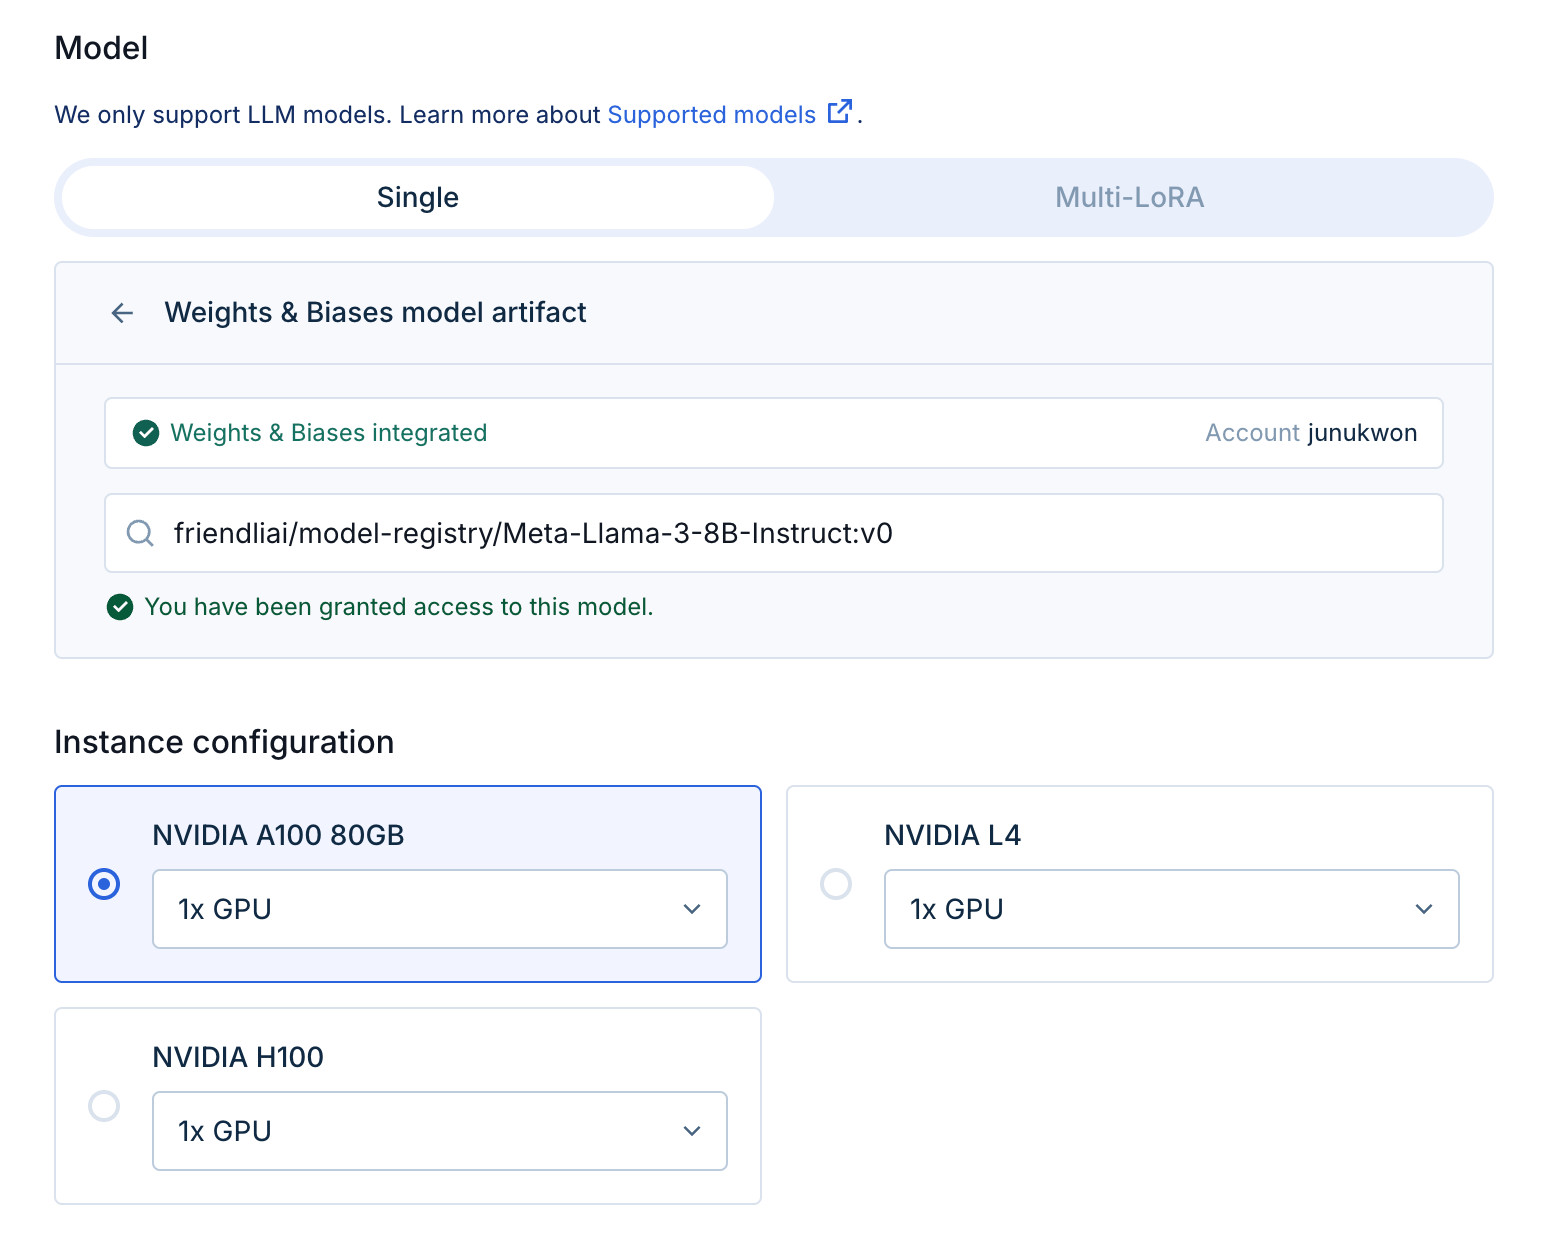
- Select the instance:
- Instance configuration: Choose a suitable instance type based on your model size and performance requirements. We suggest 1x A100 80G for most models.
note
- In some cases where the model’s size is big, some options may be restricted as they are guaranteed to not run due to insufficient VRAM.
 GPU selection
 Example Configuration
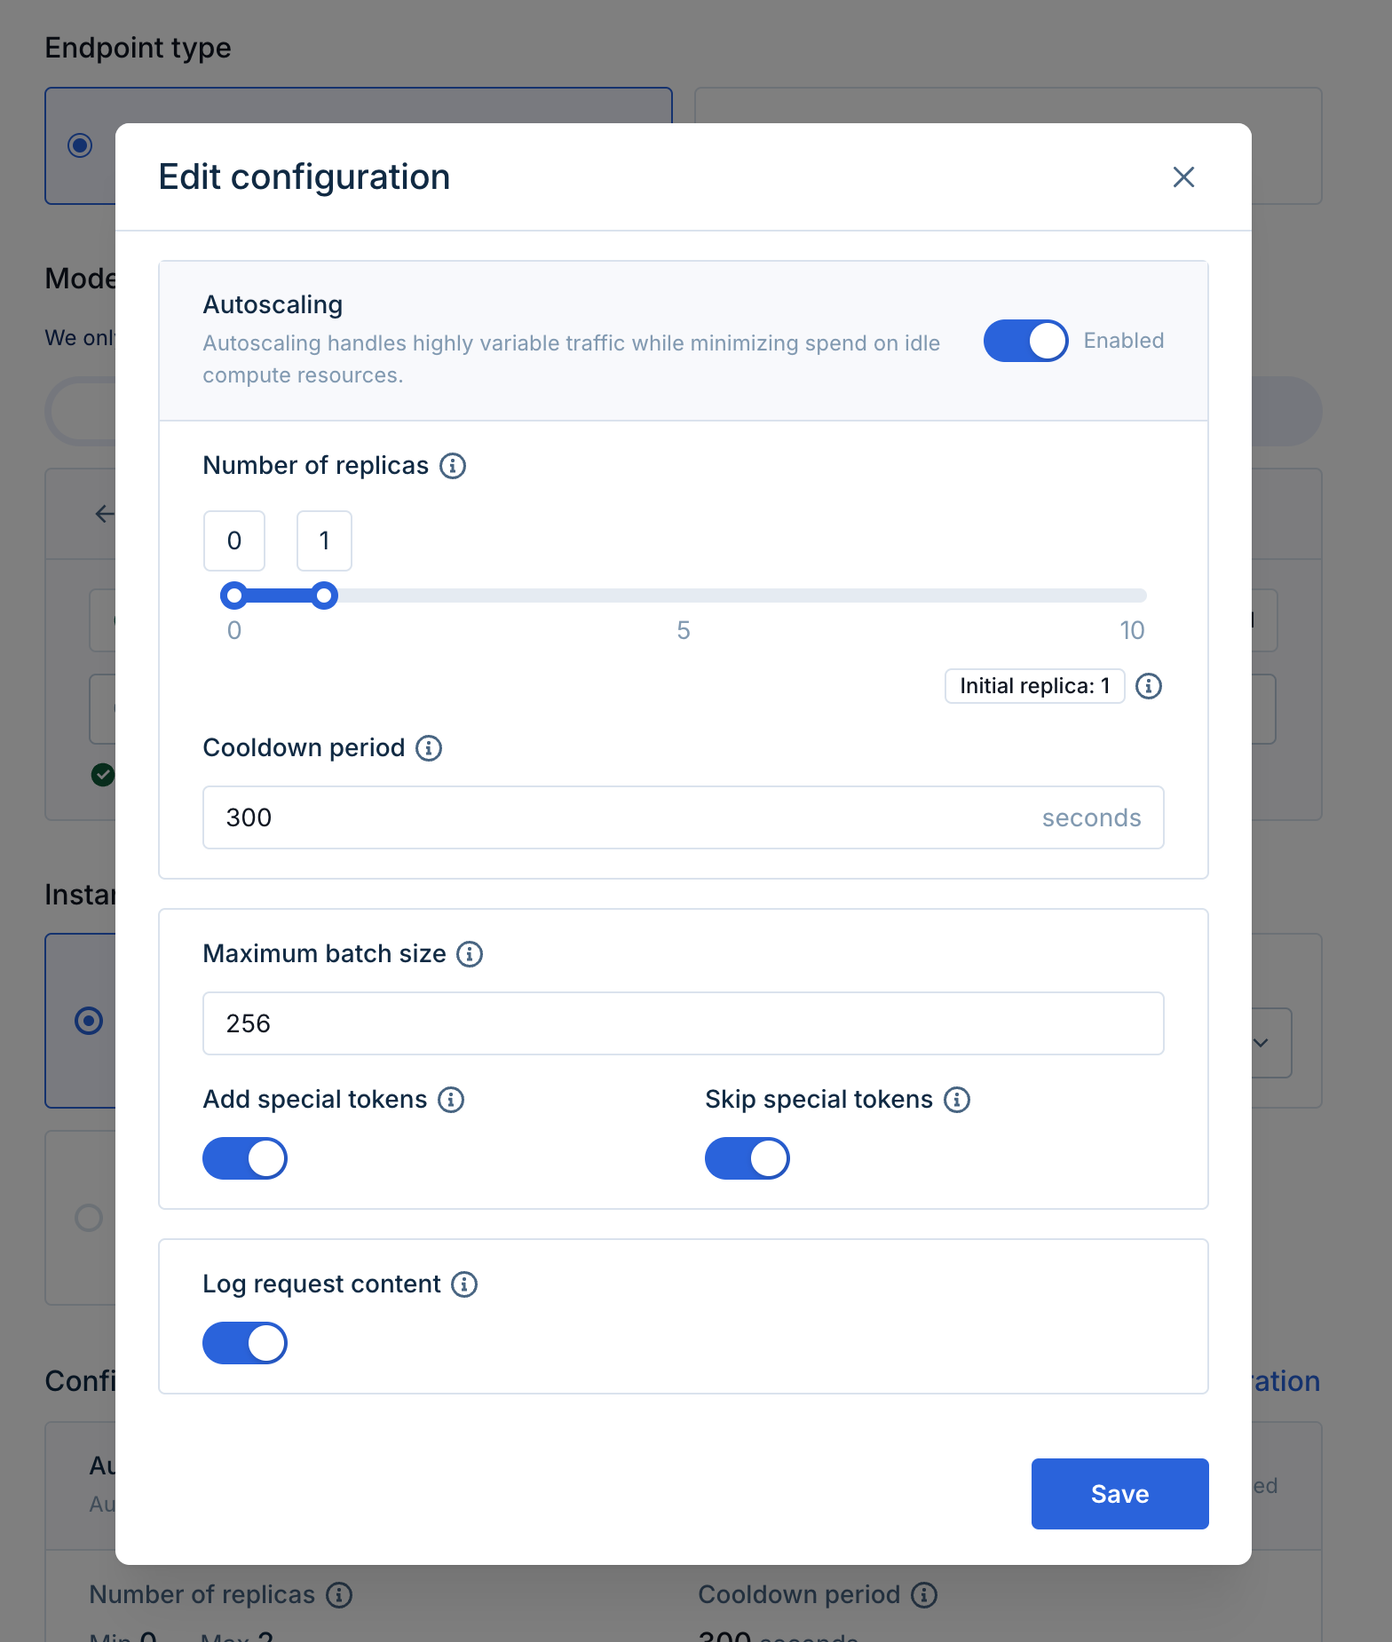
- Edit the configurations:
- Autoscaling: By default, the autoscaling ranges from 0 to 2 replicas. This means that the deployment will sleep when it’s not being used, which reduces cost.
- Advanced configuration: Some LLM options including the maximum processing batch size and token configurations can be updated. For this tutorial, we’ll leave it as-is.
- Click "Create" to create a new endpoint.
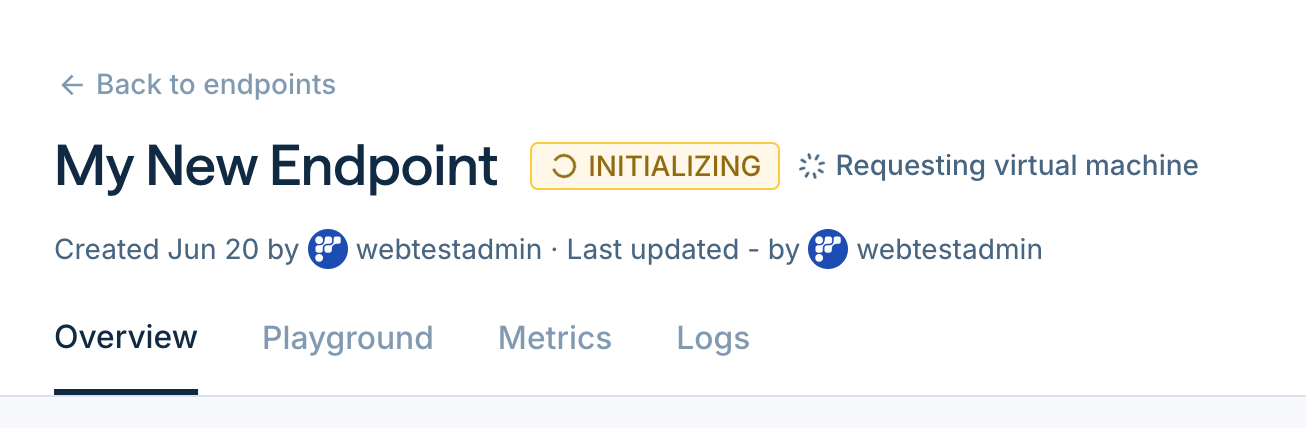
Step 2: Test the endpoint
- Wait for the deployment to be created and initialized. This may take a few minutes.
info
- You may check the status by the indicator right to the endpoint’s name.
- In the “Playground” section, you may enter a sample input prompt (e.g., "What is the capital of France?").
- Click on the right arrow button to send the inference request.
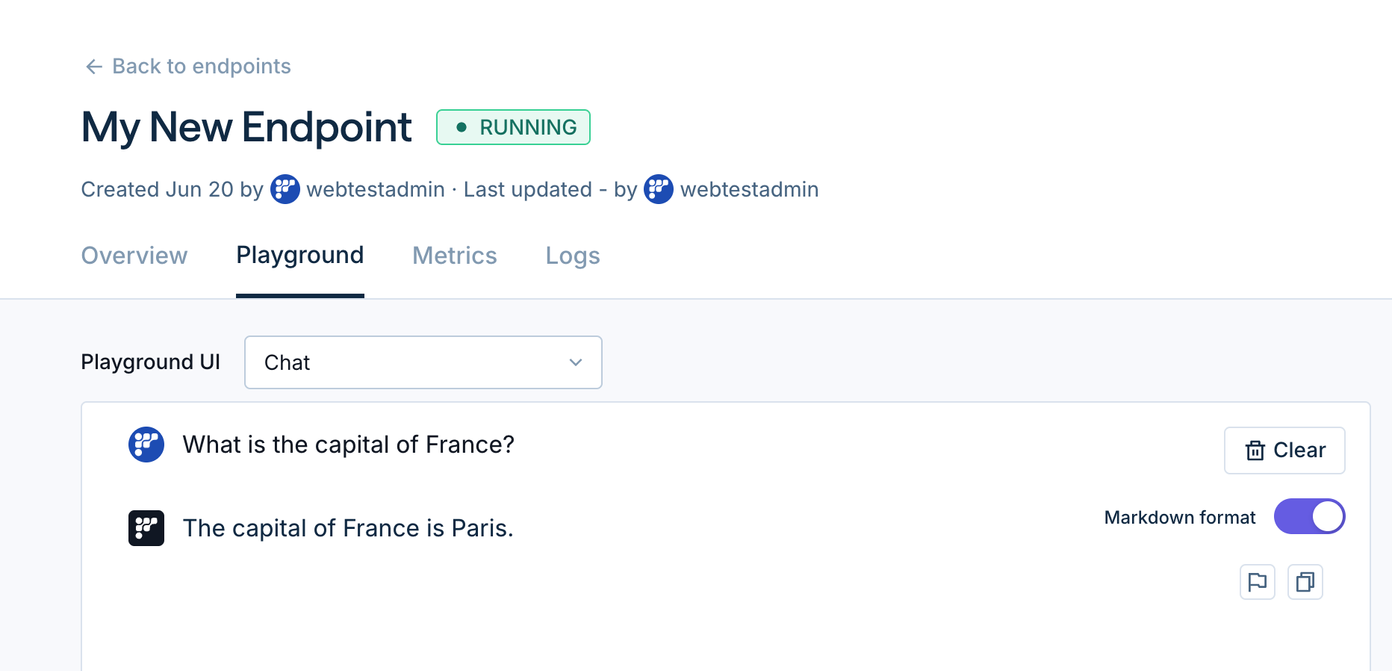
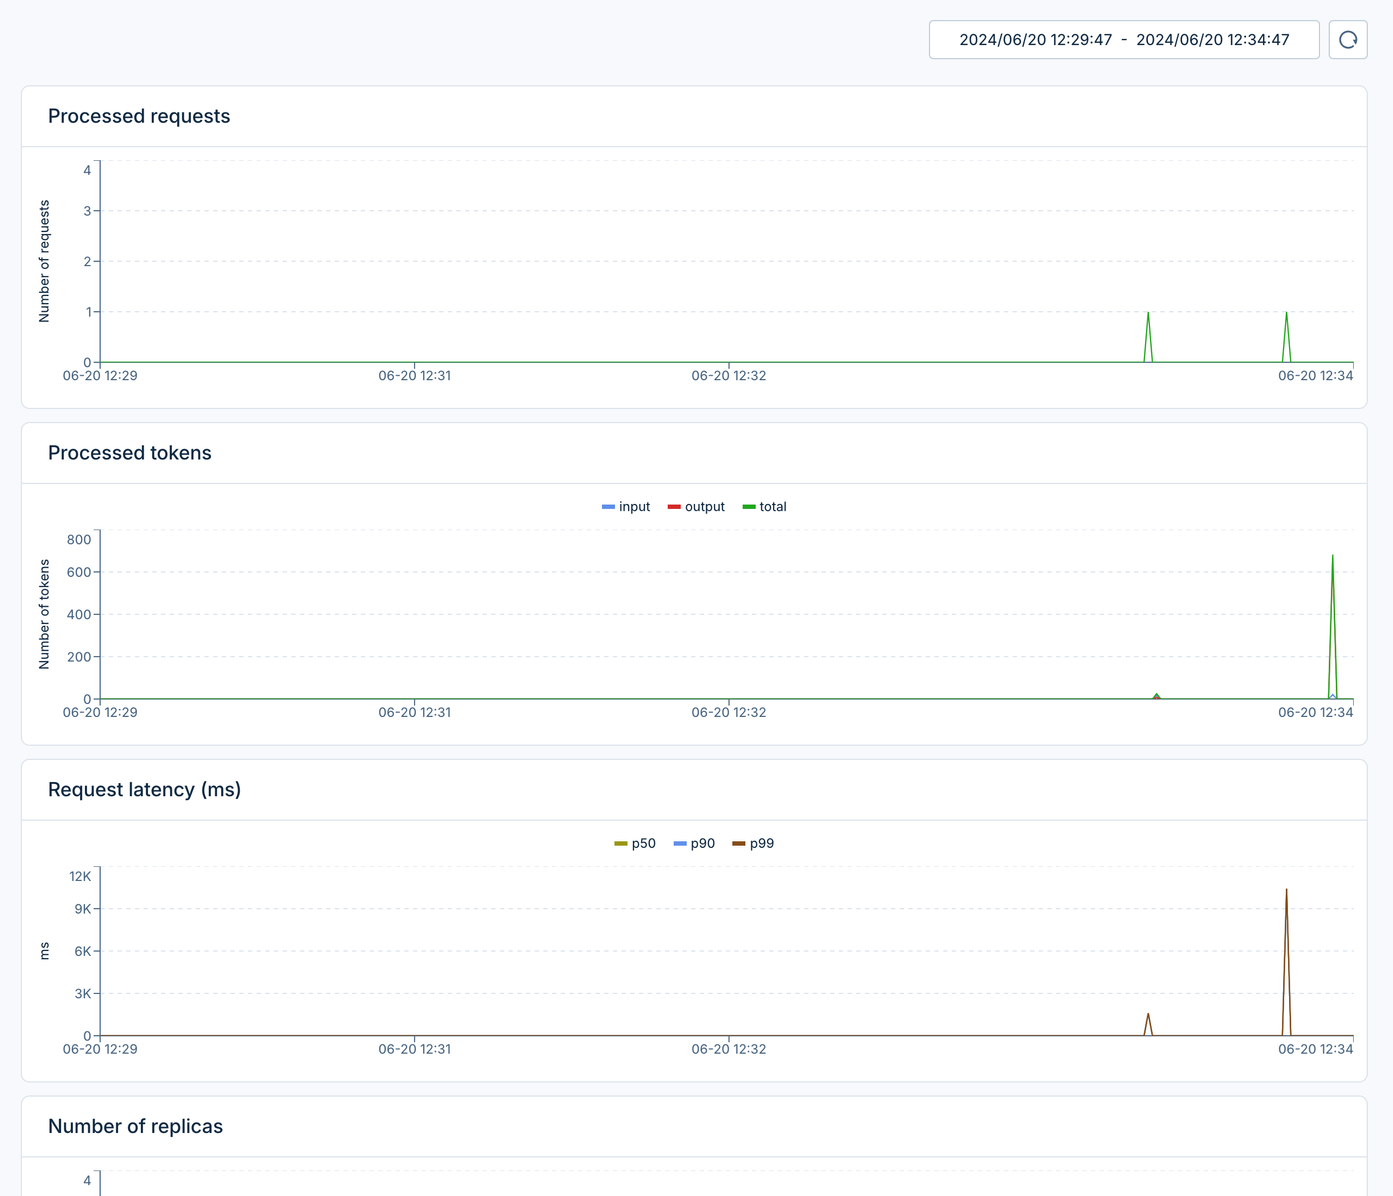
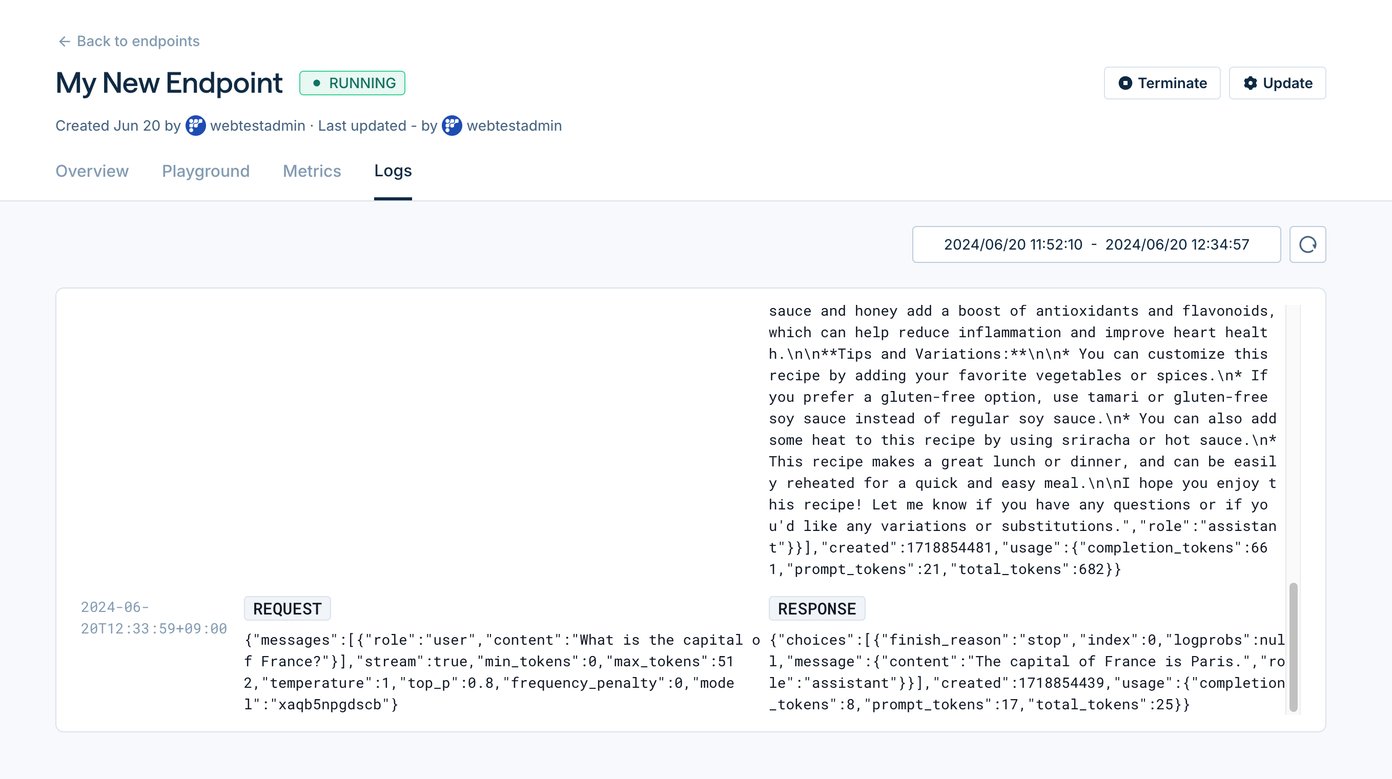
- Use the “Metrics” and “Logs” section to monitor the endpoint.
Step 3: Send requests by using cURL or Python
- As instructed in our API docs, you can send instructions with the following code:
- cURL
- Python
curl -L -X POST 'https://inference.friendli.ai/dedicated/v1/completions' \
-H 'Content-Type: application/json' \
-H 'Accept: application/json' \
-H 'Authorization: Bearer <TOKEN>' \
--data-raw '{
  "model": "<MODEL_ENDPOINT_ID>:<ADAPTER_PATH>",
  "max_tokens": 200,
  "top_k": 1,
  "response_format": {
    "type": "text",
    "schema": "string"
  },
  "prompt": "What is the capital of France?"
}'
import requests
import json

url = 'https://inference.friendli.ai/dedicated/v1/completions'

payload = json.dumps({
  "model": "<MODEL_ENDPOINT_ID>:<ADAPTER_PATH>",
  "max_tokens": 200,
  "top_k": 1,
  "response_format": {
    "type": "text",
    "schema": "string"
  },
  "prompt": "What is the capital of France?"
})
headers = {
  'Content-Type': 'application/json',
  'Accept': 'application/json',
  'Authorization': 'Bearer <TOKEN>'
}

response = requests.request("POST", url, headers=headers, data=payload)

print(response.text)
Step 4: Update the endpoint
- You can update the model and change almost everything by clicking the update button
note
- Editing the configuration only works when the endpoint is running. If it is sleeping due to extended periods of inactivity, press the awake button and wait until the endpoint once again becomes available.